Showing posts with label projects. Show all posts

Monday, May 24, 2010

Life Cycles

Adults often talk with kids about how they're growing, how they used to be a baby, how they'll one day be a man or woman. My 3-year-old says he doesn't want to be a man, only a boy. No worries, I say, you'll always be a boy.

It's no wonder, though, he's interested in the cycles of life.

Yesterday, we went with friends to observe the tadpoles at Eaton Canyon. The boys spent nearly 2 hours watching the little commas squiggling in the shallows. They also enjoyed wading in the creek, and examining stones and water bugs.

A couple weeks ago, Eaton Canyon docents had set up a table with magnifying viewers and rubber copies of the tadpole-to-frog cycle. My son looked at them and pronounced, "metamorphosis." (The docents said the tadpoles were either Pacific or California tree frogs.)

We'd been raising painted lady butterflies at home. They burst from their chrysalises last Friday, and we released them the next day.

This year several people told us the caterpillars they got from Kidspace did not emerge. But we've had good luck with the ones we mail ordered from Insect Lore.

Thursday, July 16, 2009

Amazing Amphibian Pets

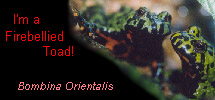
I'm a Firebellied Toad!

I'm not one for taking online quizzes. I could not resist, however, to try the What Kind of Frog Are You? survey on AllAboutFrogs.Org. I'm not sure how preferring butter to margarine equates with being a nocturnally hooting, toxin-secreting amphibian, but I'm still chuckling at my result: Oriental fire-bellied toad.  

At my house we have five pets. One goldfish, named Pumpkin Pie, and four Bombina orientalis (i.e. Oriental fire-bellied toads). They're named Steinbeck, Stegner, Emily Dickinson, and Joan Didion. 

These two-inch amphibians are excellent pets! They are incredibly easy to keep. We've had the toads for five years, leave them unattended while we're away, and haven't killed them yet. We feed them crickets twice a month; clean their tank when it looks nasty. They thrive. They coo sweet hooting sounds at night--okay, it's not so cute if you're sleeping near them. 

Despite the designation "toad," these amphibians are mostly aquatic and need water. Fill the bottom of a tank with enough water to cover their bodies, but not so much that they can't keep their heads above it. Provide little "logs" that they can rest on and hide under. (They also like to hide in and around vegetation, real or fake.)

Just don't handle them unless you need to. Their bellies secrete a toxin that can irritate your skin, albeit a mild one. (Just wash your hands if you touch them.) 

According to my froggy quiz:
These colorful toads are very active and fun for beginner pet owners. They enjoy spending their day swimming and singing with other frogs of their species and become more active when not alone. Weird fact: Firebellied toads cannot extend their tongues like other toads or frogs. To feed, they must leap forward and catch their prey with their mouths. After they have grabbed a cricket or worm with their mouth, they usually use their fore-arms to help stuff food the rest of the way in. Then they squish their eyeballs down in their heads to push the food into their throat.

Observing frogs seems to me to be an essential childhood experience. But it's getting harder to find them in the wild. Southern California's mountain yellow-legged frogs, red-legged frogs, and arroyo toads are endangered. Conservation biologists say nearly one-third of the world's amphibians are threatened with extinction. 129 may have gone extinct since 1980.  Habitat loss, disease, pollution, predation by nonnative species, and UV radiation are among the culpritsA recent study by the International Union for Conservation of Nature (ICUN) concluded climate change could wipe out more than half of all amphibians. 

One way to protect aquatic life is not to use pesticides in your yard. This tip sheet from the US Fish and Wildlife Service offers several ideas for keeping your garden environmentally sensitive. 


Wednesday, May 13, 2009

Gardening with Kids

Beep! Beep! Machines at Work

I'm ambivalent about cars. I appreciate the mobility, but don't like all the pavement and pollution. Trucks, construction equipment and other diesel-powered machines are especially dirty. But these days, drive around with me and you're likely to hear, "There's a Backhoe!" and "look at that excavator. Wow! That's a big one." Yes, I have a son. 

He likes the garden. But nothing compares to his passion for trucks. So I've combined our interests with these dump truck activities:
  • Transporting potting soil/compost around the garden. In the picture above, he's spreading a thin layer of dirt on top of some lettuce seeds, dropped around a newly transplanted tomato seedling.
  • Mommy pulls weeds. He drives them to the compost bin. "The bugs eat them and make soil for our garden," he reminds me. 
  • Moving rocks and pebbles. Okay, this doesn't need to be done, but it keeps him busy while I work.
My son's little watering can is perfect for wetting seedlings. I also use his tiny trowels for transplanting. You can get kiddie gardening kits at toy stores and garden shops. I like our Pottery Barn set because the trowels and rake are more sturdy--they're metal and wood instead of plastic. The kit also included a spray bottle, which is a big hit.

Other garden activities for little kids
  • Plant seeds. Pumpkins and melons are fun and easy
  • Patrol garden, watch things growing
  • Pick fruits and vegetables
  • Pull weeds---maybe (If you think your kid can limit her grip to weeds and not pull plants you want to keep.) 
  • Observe butterflies, bees, and other bugs 
  • To support wildlife, garden with native plants
  • Pick flowers (Be sure to plant some things you won't mind losing to your critter. I point my son at wildflowers that reseed vigorously, such as California poppy.)
  • Buy and release store-bought lady bugs
  • Grow and release painted lady butterflies
  • Hang a bird feeder
  • Maintain a bird bath
  • Compost with worms. Your kid won't need a dog or a bunny; he'll have hundreds of pets. Stay tuned for a post on our Can 'O Worms.
Do you have a favorite gardening project for kids? Please share it.


Wednesday, April 15, 2009

The Butterflies Are Free

Nature Project for Kids

We released our painted lady butterflies (Vanessa cardui) this weekend. This was a fun and easy project. We raised five of these insects from caterpillars. My son got to see them form chrysalides and emerge as butterflies. 

The manufacturer recommends this project for kids age four and up, but our two-year-old enjoyed it. We purchased our butterfly nursery from Lakeshore; you can also order it from Amazon (search "butterfly pavilion" or see my link below). The nursery package includes a mesh enclosure and a card you send in to get your caterpillars mailed to you. 

Spring is a great time to raise your painted ladies in Southern California; in the wild they migrate to our region from Mexico starting in February (and continuing through April). 

The caterpillars arrive with all the food they'll need until they emerge from their chrysalides. Then you give them some sugar water. We released ours a few days after all five had emerged. As the flew from the nursery, my son exclaimed, "Butterfly come and play with me!"

Painted lady butterflies only live about three weeks, so we wanted them to enjoy nectar from our native plants. Painted lady larvae feed on mallows and lupines. In their butterfly stage they sip from native buckwheats (Eriogonum), yerba santa, and desert lavender (Hyptis emoriyi). More on plants used by painted ladies and other butterfly plants.

All of our caterpillars metamorphosed into butterflies. If yours don't, you can get replacements. And not to worry; this species is common and widespread. (It's sometimes called "Cosmopolitan.")  The experience has increased my son's appreciation for the many butterflies in our yard. He likes to watch them drink from the flowers. 


We're saving our nursery equipment so we can order more caterpillars next year. Want to see butterflies up close with out rearing them? Visit the Natural History Museum's Pavilion of Wings. It recently reopened for the season. 

Wednesday, April 8, 2009

Little Sprouts II

GARDENING WITH KIDS

Try this easy gardening project with the little people in your life. My son and I sprouted these pumpkin plants indoors earlier this year, but now, in Southern California, you could start them outdoors. My two-year-old placed the seeds in these old baby food containers (punctured on the bottom). I liked how he could see the plants' roots once they sprouted. The containers were too shallow for such big seeds/shoots, so the seedlings were a bit droopy--but fine. I love this shot of them in the windowsill, seeming to gaze longingly outdoors.

STARTING YOUR PUMPKINS
  1. If starting in a pot, fill it with potting soil and compost. If you don't have compost, make a green manure of cut-up veggie scraps, either from your garden or your kitchen. "Even the best potting soil is sterile," says Marta Teegan of Homegrown Los Angeles. You want the beneficial microbes compost or green manure will provide.Teegan recommends adding some slow-release, granular vegetable mix organic fertilizers such as Dr. Earth or E.B. Stone Organics. If you do all of the above, she says, you shouldn't need to add more fertilizer later. If you use green manure, wait two weeks before planting in the soil.
  2. If you're starting directly in a garden bed, add the mixture above to your soil. You can also try mounding the enriched soil on top of your existing soil.
  3. Make 1/2 inch-deep holes, and place one seed in each hole, laying it sideways. Cover the hole with soil and water. 
  4. Keep soil moist but not drenched. If you use a pot, it needs to have a hole at the bottom.
  5. Put your pot or plant your seed in a spot with full sun, i.e. at least six hours a day.
  6. If you're transplanting to a large pot, you'll need stakes to grow the plant up. In a garden bed, place your little pumpkin where you'll have ample space for the vines to wind. Ours are planted where they can skirt blueberries in barrels and creep over irises as they die back later in the year.
  7. Spread mulch around your plant, but leave an inch or two of bare soil near the stem.
  8. For pumpkins in pot, break off the growing tip of the plant--the very top part--when the plant reaches about two feet.


By the way, kiddie gardening tools are great for starting and watering seedlings. I use my son's miniature trowel to scoop soil for small pots. The fine spray from his watering can is perfect for little sprouts.

Gardening with toddlers is fun--and challenging. Of course, they want to pick everything. I keep a few patches of weedy wildflowers so I channel his plucking energy in that direction.

RECOMMENDED READING


My son and I like the Let's-Read-And-Find-Out Science book From Seed to Pumpkin. Beautifully illustrated, it describes the life cycle of pumpkin plants.

Currently, there isn't a great one-stop organic veggie growing book for our region. But try a combination of The Vegetable Gardener's Bible by Edward Smith and Pat Welsh's Southern California Gardening. Smith's book provides a good overview of organic gardening, as well as growing tips for most vegetable plants. Welsh's book, although a bit dated, will tell you optimal times for planting locally, which you won't find in most gardening books.
I also like The Edible Garden by the editors of Sunset Magazine. 

Last but not least, check out The Urban Homestead by Kelly Coyne and Eric Knutzen. This book has great gardening, composting, water recycling, and canning tips. Plus many DIY projects for your home and garden. The books is widely available, but why not buy it from them at Homegrown Evolution?

Another great way to learn: take a class. Make sure it's an organic gardening class. I recommend Marta Teegan of Homegrown Los Angeles. Teegan also teaches composting. The LA County Department of Public Works offers composting and "water-wise" gardening workshops. Check out it's Smart Gardening website.

More from me on sustainable gardens.


Thursday, March 12, 2009

Little Sprouts

GARDENING WITH KIDS
Our two-year-old loves to harvest things from our garden--flowers, pea pods, carrots, lettuce I don't want picked yet--even if he has no intention of eating them. That's okay with me. I figure a little cuddling with the broccoli might spark future interest of the culinary sort. I have to remind myself it's worth losing some blooms, fruits and foliage to promote his interest in plants.

Here's a simple project to try at your home. 
  • Buy some basil seeds
  • Have your child help you almost fill small pots (with holes) or the bottom of an egg carton with potting soil or homemade compost. It's worth buying your kid her own little trowel and watering can. It will keep her busy while you work in the garden--even if she's watering the rocks. 
  • Place four or five seeds in her hand, have her spill them into the dirt.
  • Cover with about 1/8 inch of soil.
  • Put pots somewhere in your home that's warm and light. (Once nighttime temperatures are over 50 degrees you can seed outdoors, but it's also fun to have little pots indoors.)
  • Water lightly to keep soil moist but not drenched.
  • After they sprout, thin the seedlings to 4 inches or more a part. (They'll look the little guys on the left in the photo above.) 
  • Transition them gradually to outdoors, giving a little more direct light each day for a few days.
  • Plant in a sunny spot outside once the p.m. temperature is reliably above 50 degrees. Place in beds or pots, especially self-watering containers. Use improved soil so you won't have to fertilize the plants.
  • Harvest sparingly until your plant is about three inches tall, then clip more aggressively if you want. 
  • Enjoy. Basil is sweet, so you may be pleasantly surprised to discover (if you haven't already) your picky toddler loves fresh pesto. Ours does. You can also make a great kid-friendly pesto with 2/3 basil 1/3 parsley. 
  • At the end of the season, let your basil bloom and seed. Collect seed, and/or leave seed heads for birds to feed on. Darling little bush tits flock to my basil.
Above: Our son is much more enthusiastic about picking broccoli than eating it. But homegrown broccoli is so much more delicious, much sweeter than store-bought.  He does love eating the peas he shoots out of the pods of our sweet peas. I eat the shells he rejects.

Warning: once you toddler realizes there are edible things in the garden, he will probably want to sample just about every plant you've got. Fortunately, we have very few that are toxic. Nevertheless, it surprised us when our son--who avoids most things that aren't sweet--took a liking to manzanitas, both the flowers and the bitter little berries. It happened after we observed bees drinking from the pink, urn-shaped flowers. He decided to imitate the insects. What a wanna-bee.

Recommended Reading: 
  1. Southern California Gardening by Pat Welsh
  2. From Seed to Pumpkin (Let's-Read-And-Find-Out Science). Our son has enjoyed this since he was quite young. 
  3. The Urban Homestead by Kelly Coyne and Erik Knutzen. 

Thursday, February 5, 2009

Do Try This At Home

NATURE PROJECT: BIRD FEEDERS

Here's an easy way for your little one--and bigger kids, too--to get an up-close look at birds: Add at bird feeder to your yard. Among the species that frequent feeders in the LA area are house finches (pictured above), lesser goldfinches, mourning doves (they'll probably handg out on ground below the feeder and catch the spill), house sparrows (these are not native), scrub jays, and--if you're lucky--banded-tail pigeons (no, not the sidewalk pests, lovely native doves).

There's no real trick, but here are my tips:
  • Buy a long feeder like the one above. I've had squirrels breach every kind of bird feeder except this one. Yes, I tried the kind where the doors slam shut if a heavier critter perches there. The little gymnasts just hung from their back legs and reached their paws in without tripping it. This feeder is simply too long for them to reach from the branch to the opening. Of course, you need to hang it away from other branches. Mind you, I don't have a problem with the squirrels, but they gobble up my seed budget fast.
  • Hang the feeder on a limb that reaches over a flower bed, not your lawn. That way most bird poop stays away from where kids play.
  • Fill your feeder with 100% black sunflower seeds. The little ones. You can buy them at OSH. Sure, you can use the other stuff, but you will probably end up with weeds in your yard. These little sunflower seeds are nutritious, and the only accidental plant you get is a sunflower.
  • Clean your feeders occasionally to prevent the spread of disease from one bird to another. The same goes for bird baths.
  • If possible, hang your feeder where your kid can watch from an indoor window, for closer viewing.
  • Add a bird bath. Put it where your child won't play in it. Make sure it is cleaned and emptied regularly, in part, to prevent mosquitos breading there in warm months. West Nile virus is still a threat. Still, unless you are constantly topping it off, in the summer, a shallow bird bath will likely dry up before mosquitoes can hatch. 
If you want to do more for birds, add native plants to your yard. Visit the Theodore Payne Foundation to buy them. Ask for their list of bird-attracting plants.